Are you searching for an honest OptinMonster review?
Then you are in the right place.
I have tested and tried this plugin for a few of my niche websites. Check out this post for a complete review of OptinMonster and see whether it is the best tool to grow your list.
OptinMonster Review

Building an Email list is one of the best ways to grow your blog. When you have an email list, your blog can be secured from any Google updates (ie updates).
Though there are many plugins available for WordPress users, OptinMonster stands out from the crowd.
In this OptinMonster review, we will check out its features, which will help grow your email list.
Before we move into the review, let us see a brief introduction to OptinMonster.
What is OptinMonster?
OptinMonster is a powerful lead generation tool that was launched by Syed Balkhi of WPBeginner and Thomas Griffen in 2013.
700,000+ websites are using OptinMonster to turn their website traffic into leads, conversions, and sales.
Apart from WordPress, you can use it on any non-WordPress sites that support HTML.
Some of the best features of OptinMonster are as follows:
- Beautiful form designs
- MonsterLinks
- A/B testing
- Drag ‘n’ Drop Builder
- Page-level targeting
- Exit-intent technology
- Geo-Location Targeting
- Built-in analytics and reporting
- InactivitySensor
- Integration with all major email providers as well as custom HTML forms.

How to Set Up OptinMonster?
To set up, you need to sign up for an account and choose your plan. Note that all plans come with a 14-day money-back guarantee period.
After you have signed up, you can log in to your account and create your first beautiful opt-in form.
Creating your first opt-in form is very easy.
There are several pre-designed templates to choose from. Also, there are types of opt-in forms to select based on your subscription.
The types of opt-in forms are as follows:
- Lightbox Popup
- Sidebar Form
- Slide-In Scroll Box
- Floating Bar
- In-Line Form
- Countdown Timer
- Fullscreen Welcome Mat
- Content Locker
Below are some of the templates you can use when choosing the Lightbox popup.
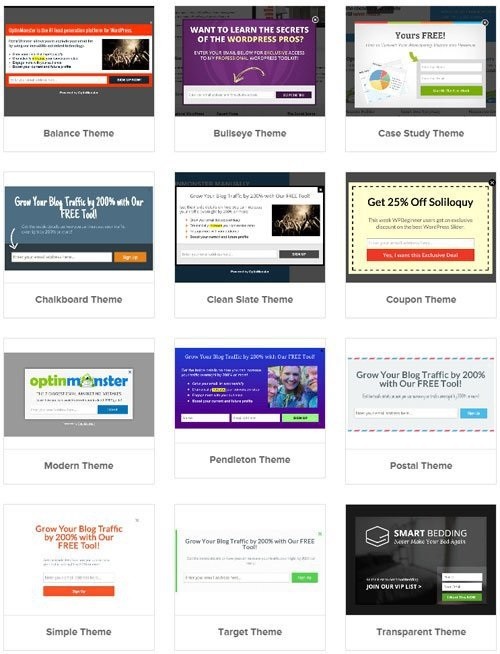
There is a huge list of templates to choose from depending on the type of opt-in. Lightbox popup has the highest number of themes to select from.
All these templates can be customised based on your needs.
Canvas is one of the best options using which you can change the dimensions of your form. Also, you can enter custom HTML and CSS to customise your opt-in form.
OptinMonster has an easy integration option with all the leading email marketing providers like AWeber, Marketo, MailChimp, ConvertKit, Mailerlite, etc.
You can use all the options very easily. If you need any help, they have huge documentation for you.
OptinMonster Features Which Help Grow Your Email List
OptinMonster has a variety of features, and the following are some of the best features which help you grow your email list.
Manage Multiple Websites On A Single Dashboard
This is the main reason why many people buy OptinMonster. With others, you need to install the plugin on every website you own and manage the campaigns.
With OptinMonster, there is no need to install it on every site. You can manage all the sites on a single dashboard.
Exit Intent Technology
One of the notable features of OptinMonster is exit-intent technology.
According to OptinMonster, “70% of site visitors who abandon your site never return.” That’s why OptinMonster detects user behaviour and shows a popup when the user tries to exit your site.
When the user tries to exit the site, they will get a popup that gives them a chance to change their mind.
In other words, popups will be visible only to those users who are about to leave your blog.

With exit-intent popups, you can show the visitor your targeted campaign.
It may be a free case study as shown in the image above, or sign up for a free product trial or book a free consultation call.
A/B Testing
A/B Testing is an important feature of any marketing campaign. With OptinMonster, you can easily create an A/B Test with a click of a single button.

In the notes section, give as many details as possible that will be helpful for reference. After you have named your split testing campaign, you can customise the form to see which one performs better.

MonsterLinks
Ever wondered if you can convert a link or image into a beautiful popup? Yes, with OptinMonster you can do that.
MonsterLinks is one of the best features of OptinMonster. It converts any image or link into an opt-in form.
Whenever a user clicks on any image or link on your site, they will get a 2-step opt-in form that asks them to buy or subscribe to your list.
Since they already clicked on the link or image, they are likely to complete the action (buy or subscribe).
With Monsterlinks, you can increase conversion rates easily. According to OptinMonster, some publishers recorded an opt-in rate of between 20 and 30%.
Page-Level Targeting
Page-Level Targeting is another useful feature of OptinMonster which displays offers and campaigns based on the visitor’s location and behaviour on your site.
With this feature, you can segment the email list based on the visitor’s interest and can send relevant emails to them.
This option helps you increase CTR, Sales, and Revenue and decrease the unsubscribe rate.
Content Lock Feature
The Content Lock Feature is another great feature that has been introduced recently. It helps you to lock a portion of your blog content for your subscribers.
Visitors will need to enter their email to see the full content. If they are already a subscriber, they can view the complete post.
Normally, you will be using plugins such as Social Lock to lock the content. With OptinMonster, this feature is included for free without any additional plugin or script.
OptinMonster Review – Pricing Details
There are four different plans available with OptinMonster. They are Basic, Plus, Pro, and Growth.

Pros and Cons of OptinMonster
Let us see the pros and cons of using the OptinMonster plugin.
Pros
- Range of opt-in form styles and themes.
- Exit-intent technology.
- Monsterlinks.
- Does not bloat the website.
Cons
- Basic Plans have only limited features.
Final Words about OptinMonster Review
OptinMonster is easy to use and can be set up within a few minutes. If you wish to grow your email list, then OptinMonster is the best choice.
I would recommend OptinMonster if you want to:
- Manage multiple websites on a single dashboard.
- Create and manage campaigns for all sites.
- Save more time in list building.
- Powerful yet affordable list-building tool for both WordPress and non-WordPress sites.
OptinMonster Review: Best Plugin To Help Grow Your Email List
- Features
- Performance
- Ease of Use
- Support
- Price
Summary
OptinMonster is easy to use and can be set up within a few minutes. If you wish to grow your email list, then OptinMonster is the best choice.


