Are you searching for an honest WPForms Review?
Then you are in the right place.
I have tested and tried this plugin on my websites. In this indepth WPForms review post, you will learn about its features and decice whether it is the best form builder plugin for WordPress.
WPForms is a fast, powerful drag-and-drop form builder created by the team that developed OptinMonster. Yes, the same Syed Balkhi and his team.
WPForms was created keeping bloggers, freelancers, and marketers in mind to create a quick drag-and-drop form that is capable of collecting not only emails but also transacting money and preventing spam.
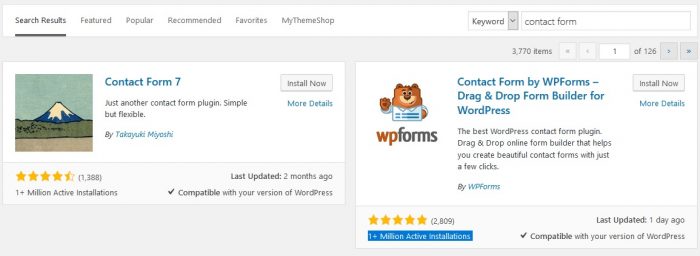
WPForms is the best form builder for WordPress with 1+ Million Active Installations and a great rating (4.9-stars on over 2809 reviews)
WPForms Review

Every site needs to offer a way to get in touch with the support/sales or administrator. A contact form on their contact or advertisement page will be the best solution to it.
There are many contact forms available namely Contact Form 7, Gravity Forms, etc. E4.9 starsts strengths and weaknesses.
WPForms has features outside of Contact Us which makes it the best WordPress form builder.
In this WPForms Review, we will check out the features of WPForms in-depth to support this claim.
Do you wish to see a video for WPForms Review?
Check out this youtube video explaining the features of WPForms in short.
If you are in a hurry, check WPForms immediately.
WPForms Features

The best features of WPForms are displayed in the image above. Let us see the features in-depth in our WPForms Review.
Drag and Drop Form Builder
To create a contact form, you do not need to write any codes. WPForms has a powerful drag-and-drop feature. Using that, you can create a beautiful contact form within minutes.
We created our contact form within 50 seconds.
Form Templates
Do not worry about the templates. WPForms has pre-built templates. These templates will save you time. These templates include
Contact Us Form
Request Form
Billing Form
Donation Form
Newsletter Sign Up
100 % Mobile-Friendly Templates
All the forms created using WPForms are mobile-friendly. No matter the device, the form will look the same.
As Google gives importance to mobile responsiveness, it is a must to choose mobile-friendly form builders like WPForms.
Smart Conditional Logic
Forms have to be smart and need to display the right information based on the visitor’s choice.
With WPForms, you can easily create such forms.
Instant Notification
Everyone loves when they get the answers or replies quickly.
With WPForms, they will get instant notifications.
Spam Protection
WPForms use honeypot technology to prevent spam. A Typical contact form does not have this feature.
Easy Payment Collection
If you want to sell something on your blog and receive payments, you can do it easily with WPForms.
You can collect payments for the service rendered or lock your premium content with PayPal and Stripe integrations.
Entry Management
This is one of the best features.
With these features, you can view all your leads on a single dashboard in WPForms. They are accessible whenever you need them.
Marketing & Subscriptions
You can connect to a list of email marketing providers namely Constant Contact, Aweber, Campaign Monitor, Drip, GetResponse, MailChimp, and Zapier.
Easy to Embed
You can easily embed the forms on your blog post, sidebar, or footer with the help of shortcodes.
Check out this video below to embed forms.
How To Create A Contact Form Using WPForms?
If you have purchased the license, you can download the core files from its site. The name of the file is wpforms.zip.
To install the plugin, navigate to Plugins > Add New > Upload Plugin and then select the downloaded zip file. Then click Install Now > Activate Plugin.
Once you have activated the plugin, select Add New under WPForms and choose the form you wish to create.
Once you have created the form, click on save in the top right corner.

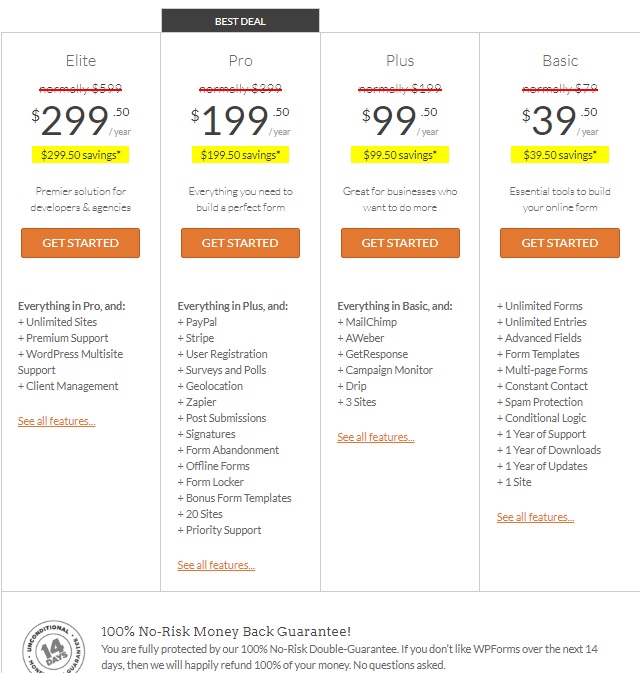
WPForms Pricing Review & Details
WPForms have a broad pricing plan.
You can use the basic free version called WPForms Lite if you wish to create just a highly responsive contact form.
For accepting payments and other features, you need to purchase the premium version.
The basic version starts at $79. With 50% off, you can grab it for $39.50 (for a limited time).
Pros and Cons of WPForms
Let us see the pros and cons of using the WPForms plugin.
Pros
- Fast, secure, and instant notifications.
- Pre-build templates.
- Payment options.
Cons
- The basic version has only limited features.
- Need more email integrations.
Final words about WPForms Plugin
That’s all about the WPForms Review.
After using the WPForms plugin for 6 years, I can confidently say that it is a reliable and powerful tool for creating forms on WordPress websites.
With its friendly drag-and-drop interface, extensive form field options, and seamless integration with popular email marketing services, WPForms simplifies the process of creating and managing forms.
WPForms Review - Is It The Best Form Builder For WordPress?
- Features
- Ease of Use
- Pricing
- Support
Summary
If you are a blogger or freelancer, you must choose WPForms because of its advantages.


